HR Onboarding Admin Guide
HR Onboarding allows you to record new employee information.
Inviting an employee in SKGenius will send them an email with a link to a 5-step form. Once the employee saves their form, their details will automatically show in HR Onboarding.
These details include:
- Personal Details
- Documents
- Bank Details
- Medical Information
When the onboarding user has been created in HR Onboarding you must add the employee’s start date in SKGenius to indicate the employee’s commencement date. CSMs are required to check the HR documents which will be sent to HR for final review. It is important that the documents are checked for accuracy.
A copy of the employee’s application can be viewed in HR Onboarding.
Prerequisites
* Please double check if an Onboarding Record already exists before sending an Invite.
If the Onboarding Record exists, then no action is necessary as the record already exists.
* Please double check if the employee exists under HR->Employee/Staff.
If the Employee record exists but the Onboarding record does not exist, then please proceed with Onboarding invitation using the same email address.
This will link the existing Employee record with the Onboarding record but the email address must be the same.
Inviting a new employee
- Log in to SKGenius

- Go to “HR” -> Onboarding

- Click the Invite Button

- Fill in the invitation details and send invitation email
Fill in Name and email, select the staff type, company name and state based on needs.
- Click “Send”, emailing the employee an invitation email
Below is the Invitation Email that will automatically send to the employee:
 After clicking “Complete Onboarding”, the employee will fill in their 5-step form.
To see what the form looks like, view the HR Onboarding Cleaners Guide.
HR Onboarding Guide - Click on “Invite Queue” to check on the onboarding inviations.

- Invitations sent can be found in the list.

- Click on “HR Onboarding” to back to the onboarding list
 After clicking “Complete Onboarding”, the employee will fill in their 5-step form.To see what the form looks like, view the HR Onboarding Cleaners Guide.
HR Check and Schedule Creation Guide
- Once the employee finished the 5-step form, they’ll appear in the Onboarding list with the Status “Pending”. Click on the “Calendar” icon to start the HR Check and create an initial schedule for the employee.
HR check process is in three stages: HR Check -> Secondary Check -> HR Approval. Only when HR approved the onboarding in the final stage, a contract will be sent to the employee.

-
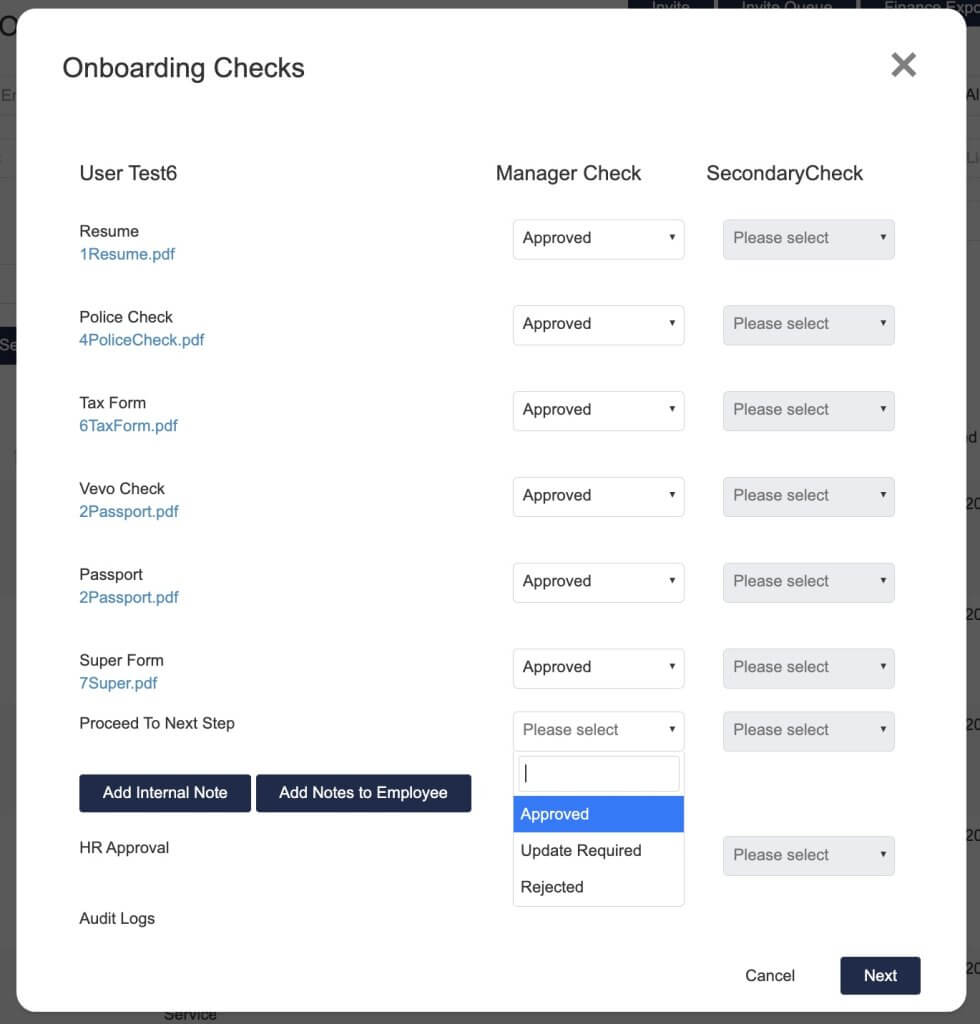
All documents uploaded on the “Onboarding Checks” page must be reviewed by the CSM, who needs to check each document and confirm the details.
For each document, the CSM can mark it as “Approved” or “Update Required.” For the Police Check and Vevo Check, the CSM can also select “Rejected” if the submitted document is invalid or does not meet the required qualifications.
*For the Vevo Check, the expiry date entered by the employee will be displayed on the Onboarding Checks page. Please confirm whether the expiry date entered matches the date on the document.
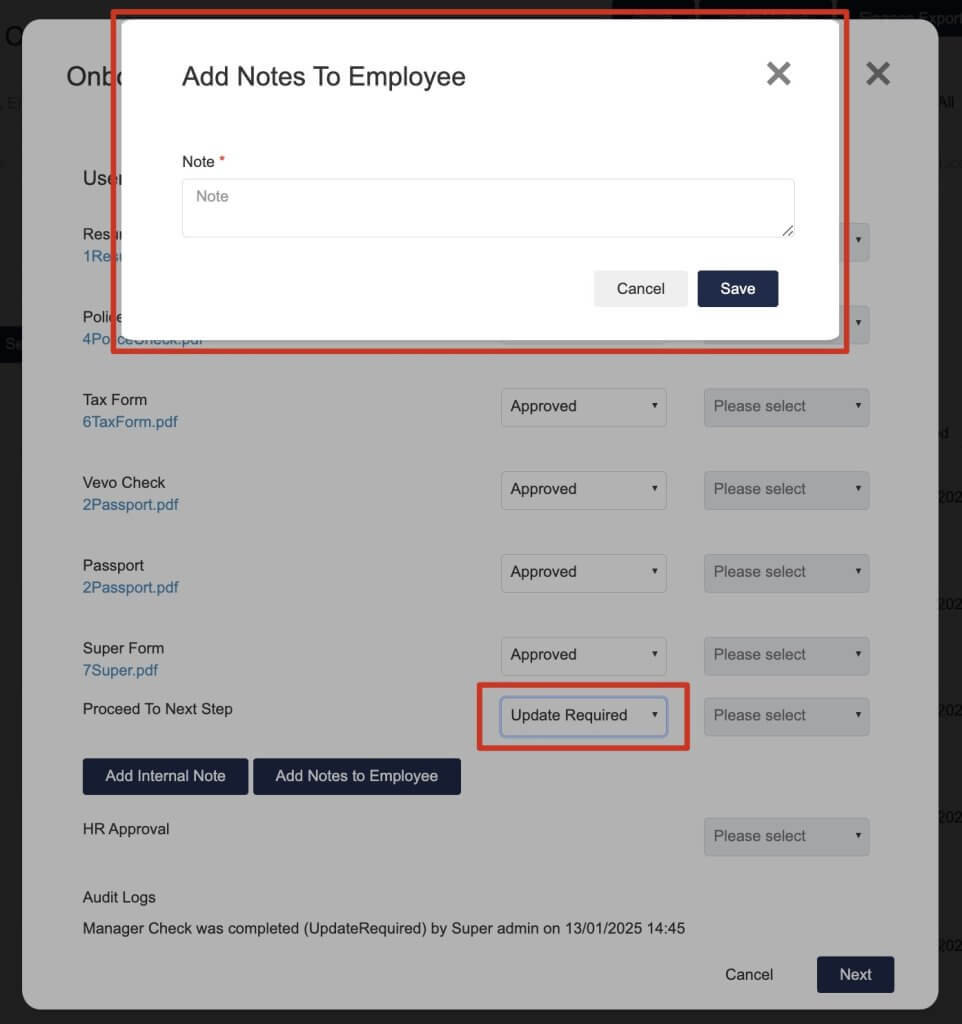
*If any of the document is marked as “Update required”, then you’ll need to add a note to the employee to give them instructions to update the document. The employee will be notified by email.

After the employee have updated the document, the edit history will appear in the Audit logs, and whoever added the “Update Required” will be notified via email to recheck the document. (If the CSM requires an update for the document, then after this document is approved, the secondary check will be notified to check this again.)
*If any of the document is “rejected” then the onboarding process will end here. All other documents will be locked.

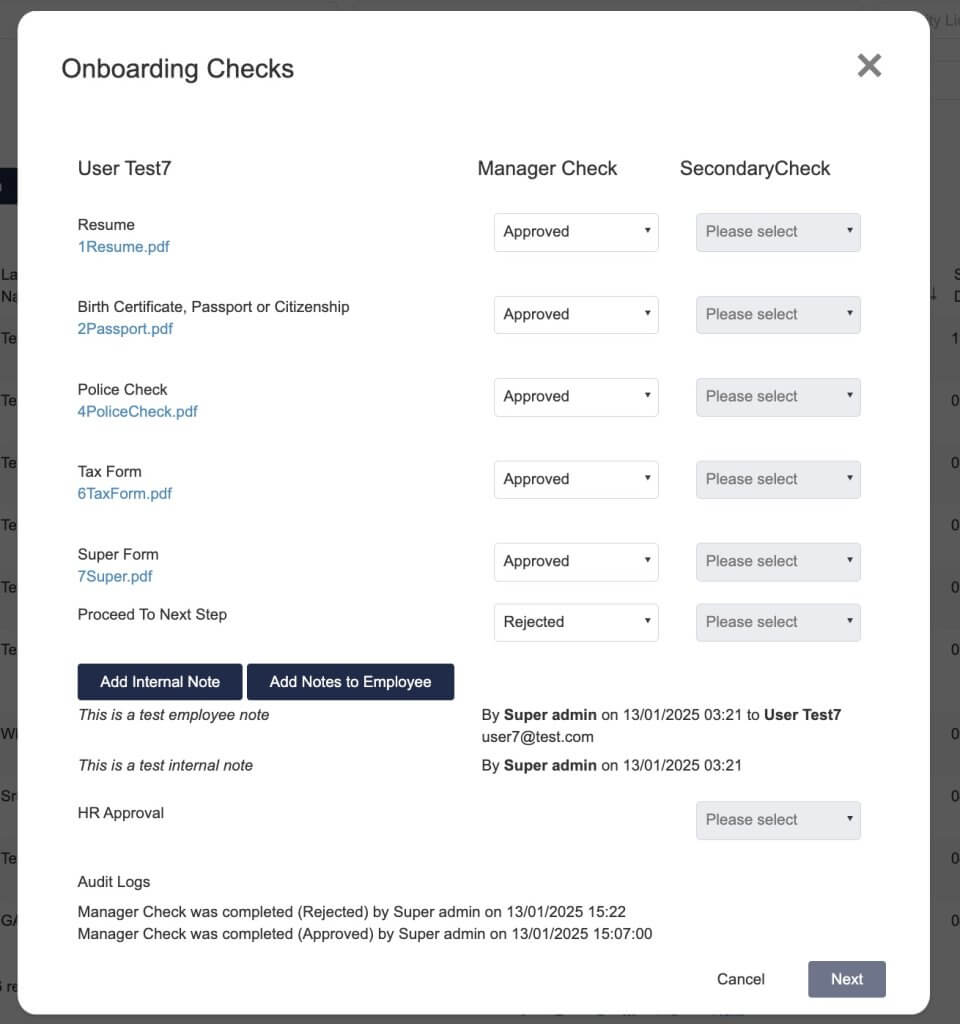
*While checking the documents, CSM/Help Desk/HR can add internal notes or add notes to employees.

*Once a note is added, the activity log will be saved, so that the approvers of the next steps can always see the notes and records.

- After all the documents are checked, the CSM can decide whether to proceed to the next step, the options are “Approved”, “Update Required” and “Rejected”.
 If it’s rejected to proceed to the next step, Then the onboarding process will be ended. It cannot proceed to the next page to create schedule or continue with the document check, the CSM need to contact the employee to discuss the next step.
Same rule applies to the Secondary check and HR check stage, if the any of the stage is “Rejected” then it won’t proceed to the next stage of onboarding checks.
If it’s “Update Required”, the “Add Notes to Employee” pop-up will open automatically. The CSM can to add notes to employee to state the details of the update requires.
Then the onboarding process will be paused, until the CSM changed it to “Approved”.
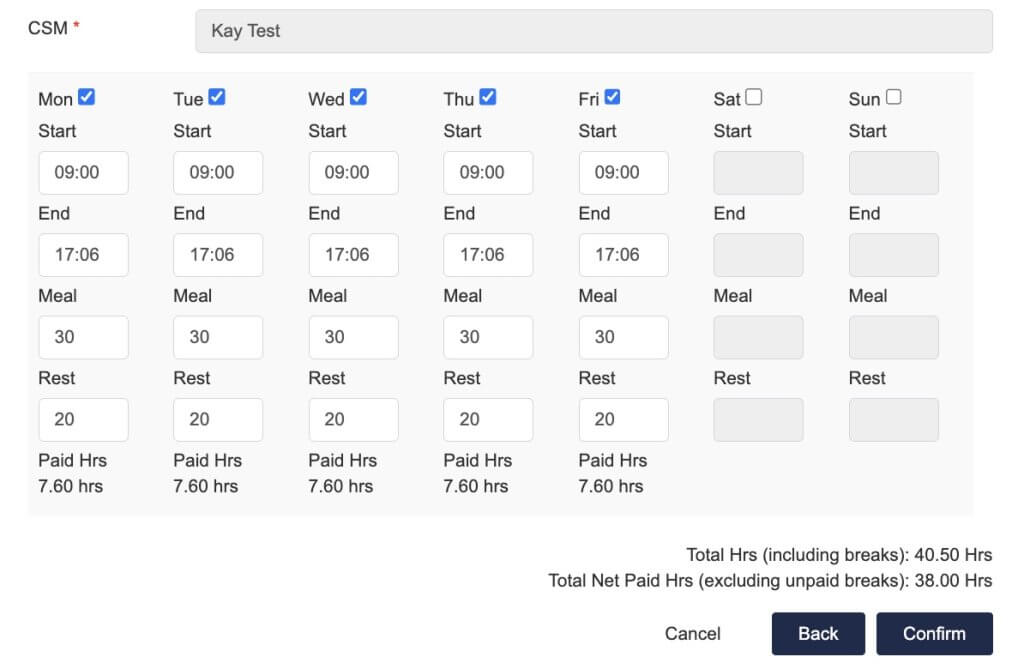
- If it’s approved to proceed to the next step, then the CSM can jump to the next page to create the initial schedule.
Fill in the start date and Pay rate level based on the Cleaning/Security Award, then select the client and site. Select the day time based on needs.
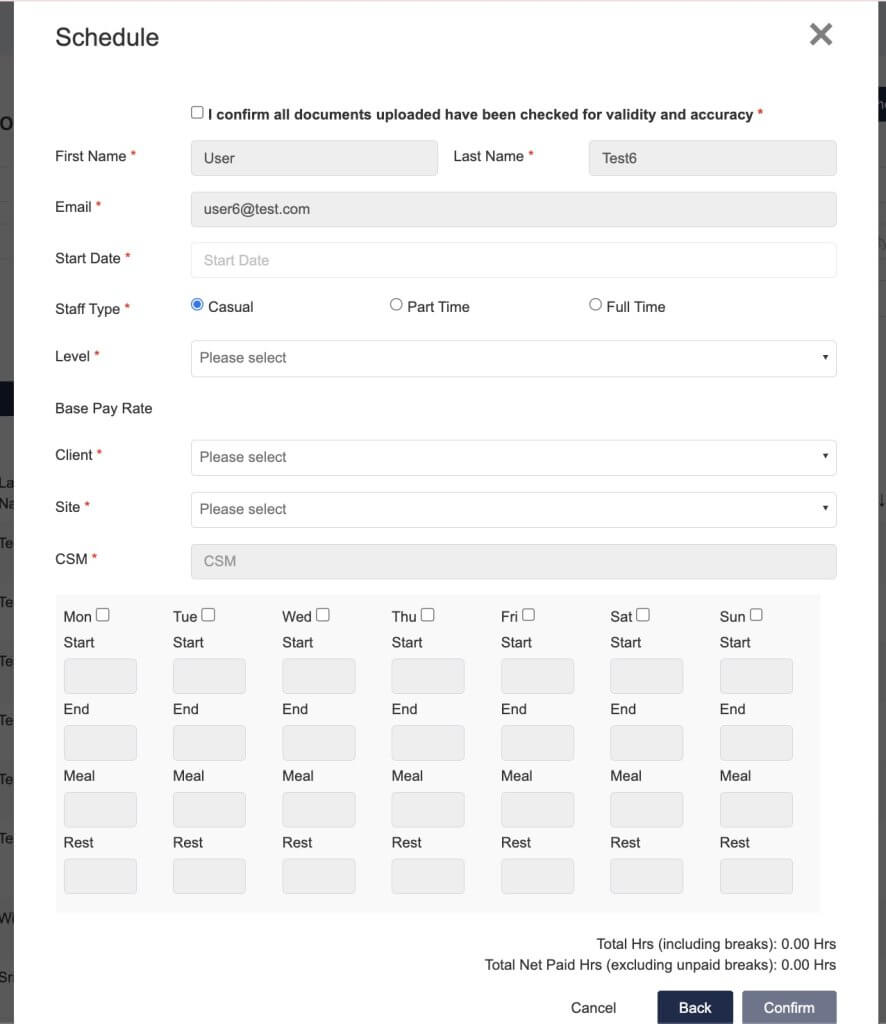
When adding scheduled hours, notifications will be provided for shift hours based on each type of employee.
For cleaning employees:
- The daily paid hours must be ≤ 7.6 hours.
- The total net paid hours must be:
- ≤ 30 hours for part-time employees.
- ≤ 38 hours for casual employees.
- = 38 hours for full-time employees.
For security employees:
- The daily paid hours must be:
- ≤ 10 hours for casual and part-time employees.
- Between 7.6 and 10 hours for full-time employees.
- The total paid hours must be:
- ≤ 38 hours for casual employees.
- ≤ 30 hours for part-time employees.
- = 38 hours for full-time employees.
You also need to add at least two consecutive days off for all types of employee. If the shifts not satisfy the rules, you’ll see a popup notification and you won’t be able to proceed to the next step.
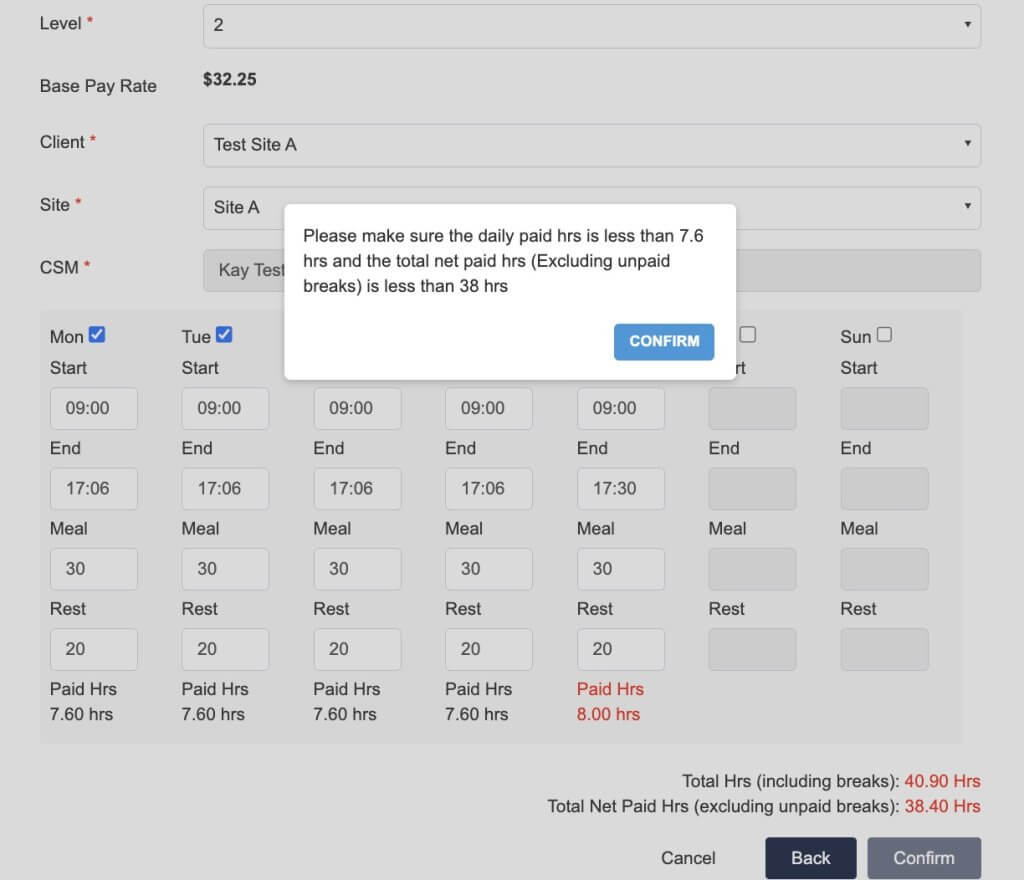
Once the hours are correct, you can click “Confirm” to create the schedule. Once the initial schedule is created, the Secondary approvers will be notified.
- After the CSM check is approved, an email will be sent to support@skg.net.au and the controllers who sees the email can conduct the secondary check.
Click the “Employee Details” to check the onboarding check details.
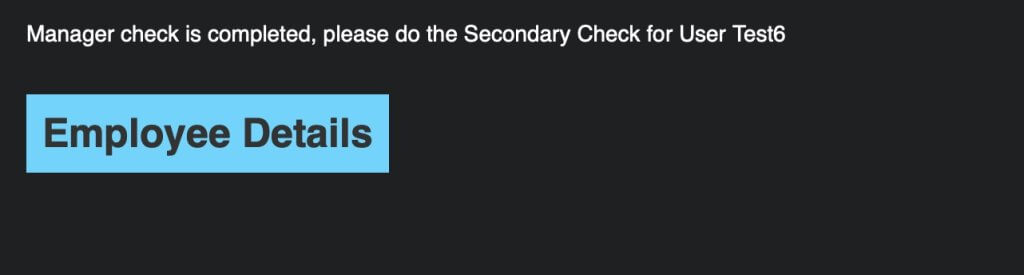
- The secondary check is the same as for Manager check, the Help Desk needs to check all the documents one by one and choose whether to proceed to the final stage, then confirm the schedule.
If the manager check is approved, but Secondary check is not approved, then the onboarding will also not proceed to the final stage.

- If the secondary check is approved, then HR will be notified then they can conduct the final check.

The HR can check the previous activity log and approval details from CSM and Help Desk. Then, they can confirm the schedule and send the contract. (Only when HR sends the contract, the employee can receive the offer)

 After clicking “Send Contract” the employee will receive an email for them to Accept Offer. To see the details of accepting offer, please view the HR Onboarding Cleaners Guide.

- Once the offer is accepted, the employee is officially onboarded. You’ll see the employee details in the onboarding list.

Headings Explanation
| Headings | Explanation |
|---|---|
| First Name | |
| Last Name | |
| Staff Type | Casual, PartTime or FullTime Employee |
| Suburb | |
| State | |
| Vevo Expiry Date | |
| Email Sent | The email address the invitation was sent to |
| Created Date | The date the onboarding staff was created |
| Submitted Date | The date the onboarding staff completed and submitted their form.
If the “Submitted Date” is blank, then the employee has not yet |
| Start Date | The date the employee starts work |
Icons
![]()
In HR Onboarding, by clicking the icons, you can view the staff’s:
- Application
- Letter of Engagement
- Documents
- Bank Details
- Edit the Staff’s Application
- Add the Staff’s Start Date
- Delete the onboarding user
Icons Explanation
| Icons | Explanation |
|---|---|
| Click to see the staff’s application. This is view-only | |
| Click to see the staff’s letter of engagement | |
| Click to see the staff’s documents e.g. passport, police check, tax form, super form | |
| Click to view the staff’s bank details including the account name, BSB and account number | |
| Click to edit the staff’s application | |
| Click to add the staff’s start date, Level (Classification) and starting roster. | |
| Use to delete the onboarding user |
HR Onboarding – Change an Employee’s Schedule
If you’d like to update the schedule for an employee, for example, change the employee type from “Casual” to “Part time”. You can create a new schedule for the employee for them to review and accept.
- Click on “Calendar” icon to update schedule

- Update schedule details for the employee and click “Send Contract” to send the updated schedule to the employee.

- Once the new schedule is sent, the status will become pending because the employee will need to accept the new one. If you’d like to cancel the new schedule, just click on “Cancel schedule”
The schedule letter sent will be recorded in the schedule section.

5. Go to Operations -> Rosters

6. Select the site and date of the schedule that just been created.
The roster can be seen in the list.

Re-onboarding FAQs
- I cannot find the original signed employee contract and the original documents cannot be located?
Please follow the standard Onboarding process and Onboarding as normal, following the process here. - I am Onboarding Users from another system. What process should I follow?
If the employee is not in the system, employees will “Onboard” as normal and double check if there are any HR changes e.g. Changes in “Staff Type”
If the employee is already in the system and are required to sign a new contract with the new staff type, then a “Conversion of Employment” is required.